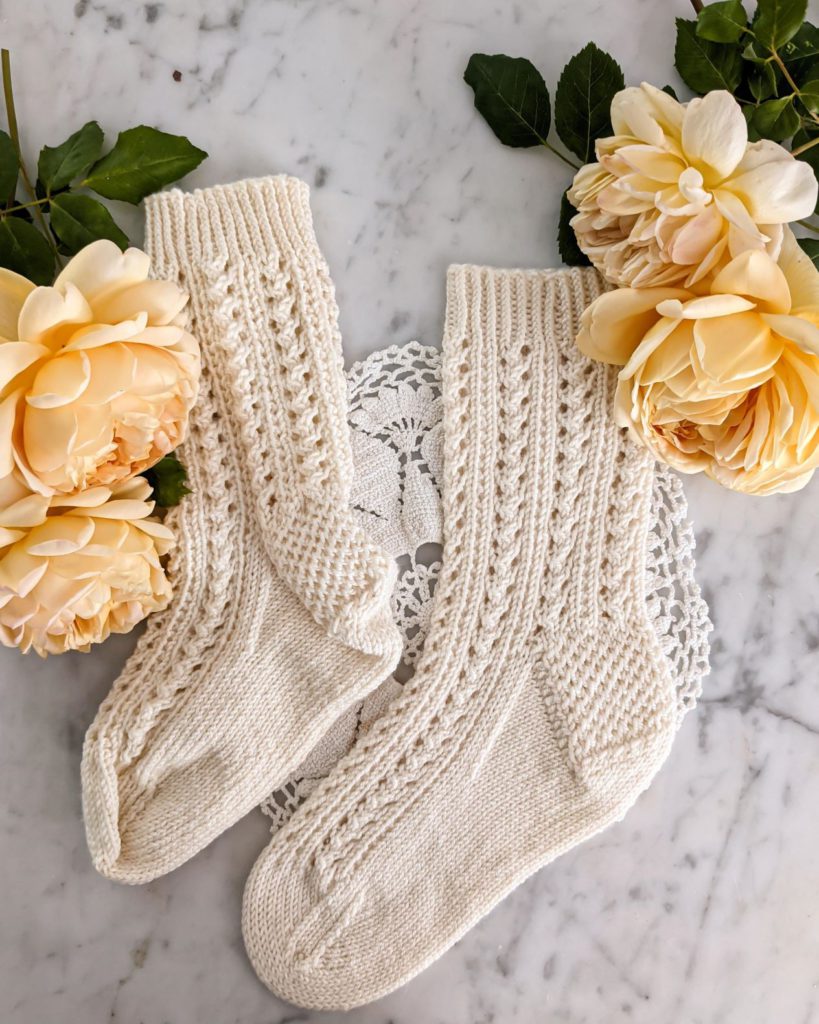
Sharing knits online is so much fun, but it can be frustrating when you’re trying to take pictures of your knits. The lighting is weird, the angles feel wrong, there’s no visual cohesiveness in your set-up. I get it! So this month, we’re talking about simple, actionable steps for better knitting photography.
Step one? Have the right gear.
But that doesn’t mean to go out and buy a fancy DSLR, a light box, several tripods, and a boom arm. Those are all nice, but you don’t need them for a good photo.
No, when I say have the right gear, I mean this: lay a good foundation by preparing your knits and preparing the camera you have.
Let me explain.
But first, a quick note: this post is one in a series of posts about ways to improve your knitting photography. Here are quick links to the other posts in the series.
Now, let’s get to it.
Block Your Knits to Get a More Professional Photo
Take a look at the photo at the top of this post. One sock has been blocked, and one sock hasn’t. Which one is more pleasant to look at?
Photography is a visual medium, and if you want good photos of your knits, you need to make sure those knits are set up for successful visual impact.
Not only is the blocked sock on its own just more pleasant to look at, it also plays with light better. Take a look at the deep shadows and strong highlights on the unblocked sock. That’s because it has an uneven surface area that obstructs the flow of light across the sock. The blocked sock, in contrast, has light flowing evenly across it.
This is crucial when photographing your knits because you want the stitches to be visible. People can’t see the stitches as well if they’re all bunched up and distorted by lighting.
So block your knits. People say putting the socks on your feet or the hat on your head blocks them just fine, but it doesn’t. You need water for the fibers to bloom. You don’t need fancy blocking forms, but you do need to soak your knits without agitation, gently squeeze them out, and shape them to dry flat. If you don’t, it will be visible in your photos. Trust me.
Wipe Down Your Camera Lens for Better Pictures of Knits
Phone cameras are so advanced nowadays that you really don’t need anything else for good knitwear photography. Don’t believe me? Just scroll my Instagram. 99.8% of the photos you see there are taken with my phone, a Google Pixel 4a (that’s not even the fancy one!).
But let’s face it–our phones are filthy. I’ve tried to be more diligent about wiping mine down with Clorox wipes thanks to the ongoing pandemic, but even so, I am constantly touching it. It gets shoved into pockets and tucked into waistbands of leggings and passed to my kid so she can snap photos and tossed into purses full of snacks. I know I’m not the only one who abuses their phone like this.
All that living leads to smears all over the camera lenses on our phones. Those smears cause blurry, dull photos. That’s the exact opposite of what we want when we’re taking pictures of our knitting.
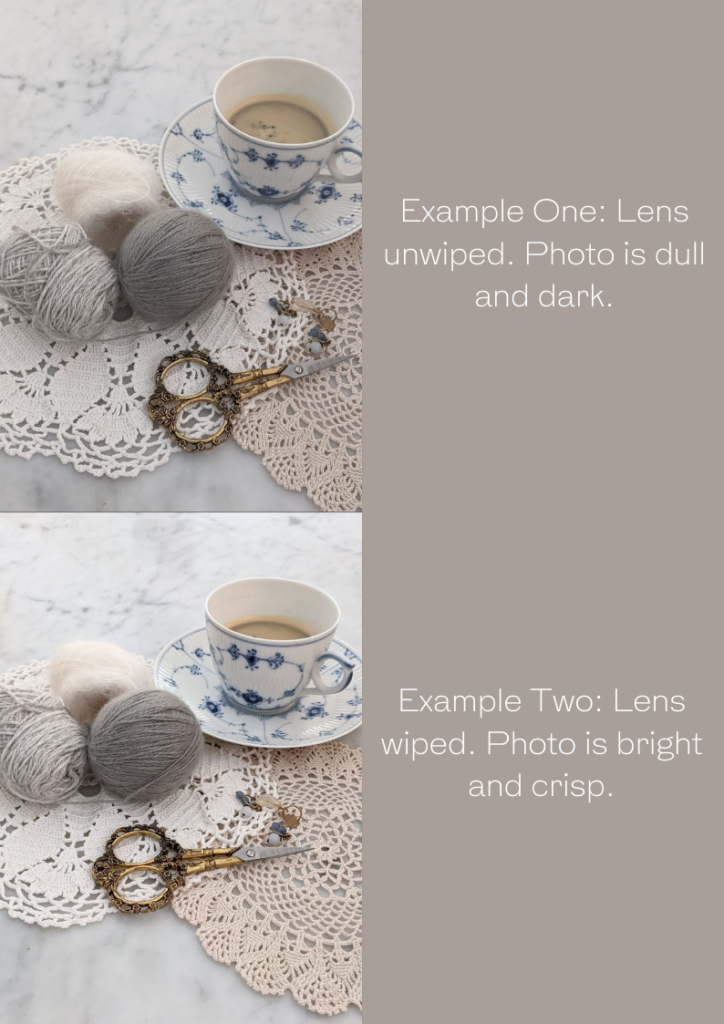
Take a look at what I mean. There are two pictures to the left. I took the first photo before wiping off the lens and the second photo after. I used the same lens settings on my phone (portrait mode, blur removed) and haven’t edited either of them. Notice the difference?
The colors in the second photo are stronger, the light appears warmer, the details in the yarn and textiles are more crisp. All that, just from cleaning the lens. Amazing.
So before you sit down to take some photos, try this: wipe off the lens of your phone’s camera with a soft cloth. A soft microfiber is best to avoid scratches, but tbh, I usually just huff a breath on it and polish with my tshirt. It’ll help make sure your photos are as crisp as can be. That’ll set you up for success once we get to the editing stage of things.
Taking better pictures of your knits starts with the fundamentals. If you make sure your project and your lens are ready, you’ve won half the battle.


Such great tips! I love the examples, I’m a visual person, and they help a lot!
Fantastic article.