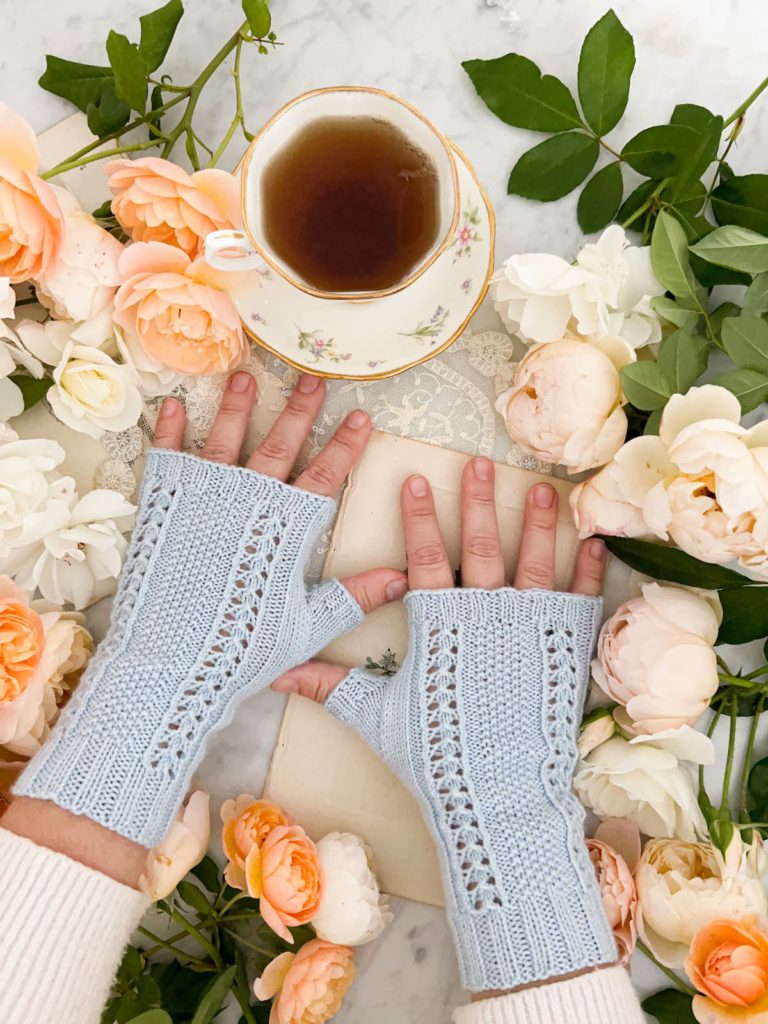
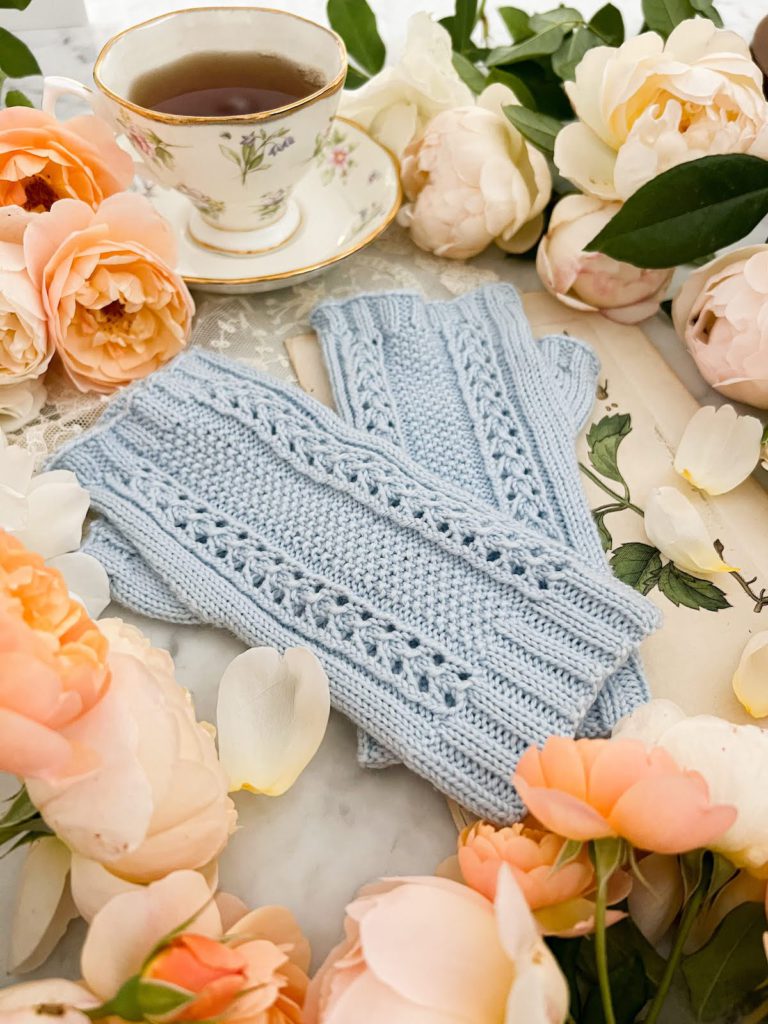
The Arroyo Verde Mitts have been updated with lots of new details! Come learn about the new thumb, tech editing, LVA version, fresh sample with better photos, and more.
Payhip
Here’s where you’ll find the Arroyo Verde Mitts on Payhip.
Etsy
Here’s where you’ll find the Arroyo Verde Mitts on Etsy.
Ravelry
Here’s where you’ll find the Arroyo Verde Mitts on Ravelry.
About the Arroyo Verde Mitts
Tucked up into the hills above Ventura is a little valley with a park in it. The valley floor is covered in a carpet of green grass, and the valley is ringed by trails through the hillsides. It’s a popular place for picnics, birthday parties, and little league games – and if you’re a dog-lover, there’s no better place in town to watch happy pups run at full speed trying to catch their favorite ball or stick.
These mitts are designed to echo the green valley floor and the ring of trails around it. They are perfect for a brisk morning walk and lightweight enough to shove into a pocket once the day warms up. If you live somewhere with mild winters, or your winter is starting its transition to spring, these mitts will keep you just the right amount of cozy.
This new version of the Arroyo Verde Mitts includes a new thumb style and placement. The original pattern used a forethought thumb, but this version now uses a thumb gusset. Most fingerless mitts and mittens have the thumb gusset placed directly on the side of the mitt, but I found that placement only works when your hand is laid flat on a surface. Otherwise, for most of us, our thumb sits slightly below the rest of our hands when we’re in a relaxed position. As a result, I moved the thumb hole so that it’s on the edge of the mitt’s palm rather than being on the side.
The new thumb placement helps keep the dainty stitch pattern from sliding across the back of the hand toward the thumb. If that’s been an issue for you with previous mitts, now you know how to modify those patterns to meet your needs, too!
Easy Shopping List
In case you want to knit this pair of fingerless gloves using the exact materials I did, here is a shopping list with easy links for you. Some of these are affiliate links, which means if you choose to buy something through those links, I’ll receive a small commission at no extra cost to you. I will always identify affiliate links for you. Thanks for supporting my work!
Knit Picks Stroll (affiliate link)
Chiaogoo US Size 1.5 (2.5 mm) short circular knitting needles (affiliate link)
The double-pointed needles I’ve used since 2009 (affiliate link)
Stitch markers (budget option) (affiliate link)
Stitch markers (fancy option) (affiliate link)
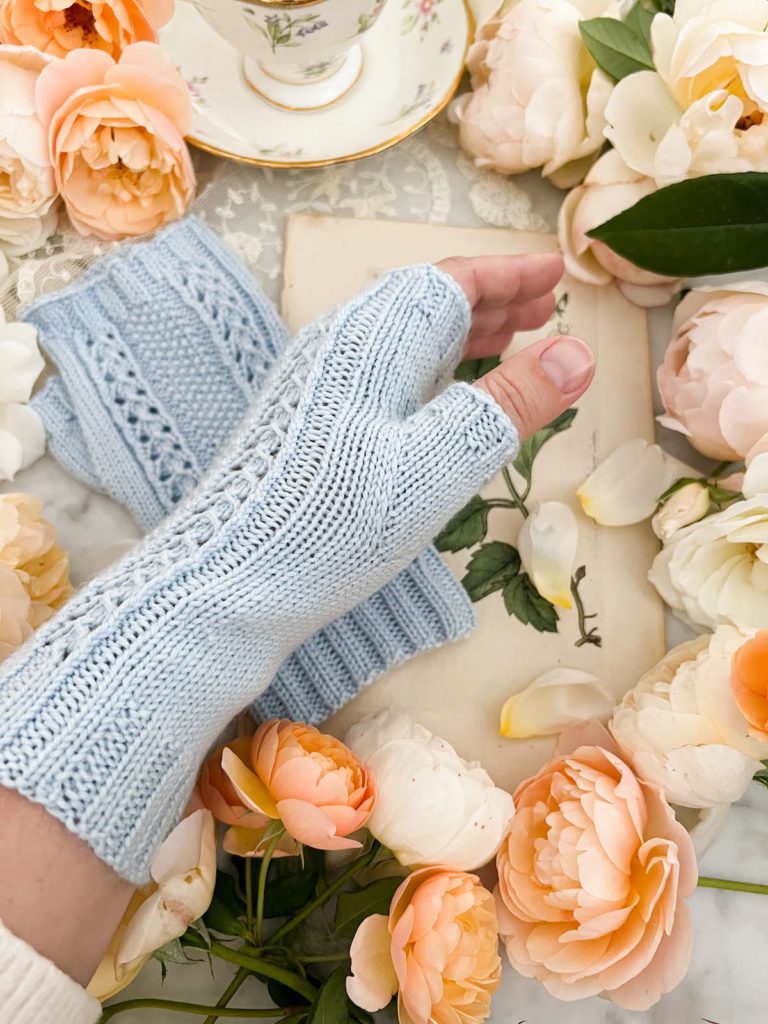
Arroyo Verde Mitts Details and Specs
Here are all the nitty gritty details about the Arroyo Verde Mitts including their dimensions, materials, gauge, needles, and more.
SIZES
One Size
Dimensions: 4” (10 cm) wide (measured flat) by 7” (18 cm) long
Will stretch comfortably
MATERIALS
Fingering weight yarn, 150 yds (137 m)
Suggested yarn: Classic Elite Telluride
GAUGE
4” (10 cm) square = 30 stitches by 36 rows in stockinette stitch after blocking
NEEDLES
One set of needles for your preferred style of small-circumference knitting in a size to match gauge listed above
Suggested needle size: US 3 (3.25 mm)
TOOLS
Scrap yarn for thumb stitches
One stitch marker
Tapestry needle for weaving in ends
SKILL LEVEL
Advanced beginners to intermediate knitters
Knitting skills: increases, decreases, twisted stitches, knitting in the round
Some Tips and Tricks for Getting the Most Out of Your Fingerless Mitts
The Arroyo Verde Mitts are a great pattern to start with if you’re just learning to knit mitts and mittens. To make sure your mitts turn out just right, here are some helpful tips I’ve gathered over the years.
1. Make a gauge swatch. This will help make sure you’re knitting at the correct gauge for the project, which will in turn make sure your mitts fit well. You want your mitts to fit snugly, kind of like a sock, so you should choose a size that will be about 10% smaller in circumference than your hand. To figure out your hand circumference, measure your palm at the widest point, just below the base of your fingers. Wrap a measuring tape all the way around your hand and make a note of that number. Then compare it to the sizes offered in the pattern.
2. Choose the best yarn for your mitts. This pattern is written for fingering-weight yarn, so you probably don’t want substitute a yarn weight that is any thicker unless you’re willing to do a lot of math. If you try to work this pattern up in worsted weight yarn, for example, without changing stitch counts, your pair of knit mitts will probably turn out too big. I also recommend a yarn with more than one ply in its construction, so the mitts will hold up well under repeated use.
3. If possible, use wool yarn. Because these mitts need to stretch across your hands and retain their shape after repeated stretching, I recommend using a wool yarn if at all possible. Wool has lots of memory, which means it is more likely than other fibers to return to its original shape after wear.
4. Feel free to play! You can knit these hand warmers in lots of different yarns. They work in tweed and in a luxe merino-cashmere blend. You could even use a different color for the bottom cuff and the ribbing for the fingertips. There are so many fun options!
Let’s stay connected!
Join my newsletter for 30% off all new releases, regular updates with helpful tips and tricks, first crack at registration for upcoming workshops, exclusive discounts, and more.
Join the A Bee In The Bonnet Facebook Group to participate in knitalongs and other fun community events
Come hang out with me on the A Bee In The Bonnet TikTok
Follow along on the A Bee In The Bonnet Instagram
Get inspired via the A Bee In The Bonnet Pinterest

