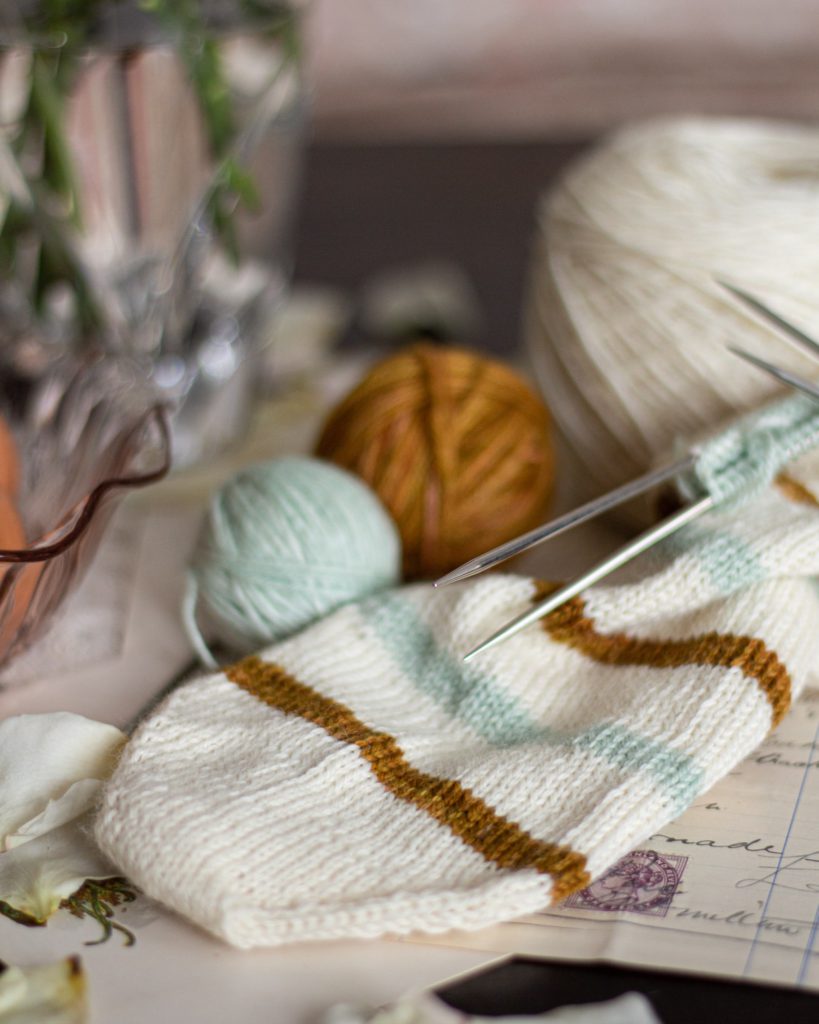
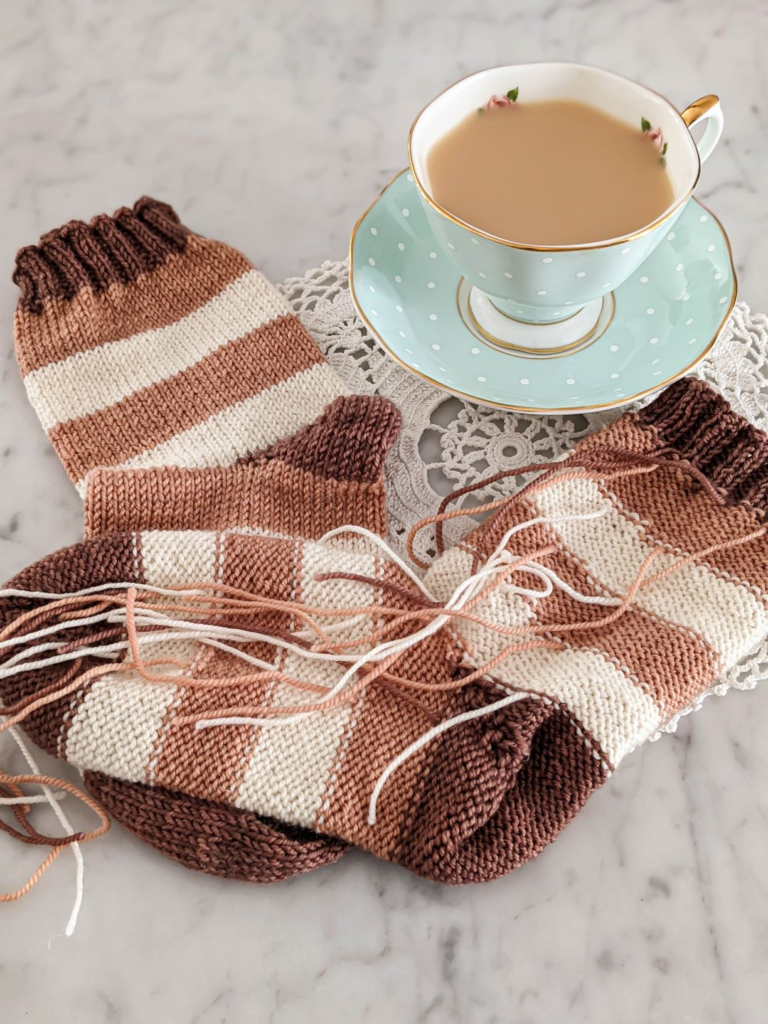
This past weekend, I started my second pair of toe-up knit socks. This time, I am knitting them in fingering-weight yarn, using leftovers from my Creme Brulee Socks and my Tiramisu socks. I’m breaking up the stripes with some white, undyed, targhee sock yarn that I bought from this shop on Etsy. Along with some new stripe styles, I decided to experiment with changing my toe up sock toes.
If you’re just now joining the saga, I wrote a little about my journey learning to knit toe-up socks. A quick review to help you get caught up:
- Here’s a post where I figured out how to cast on and how many rows I’d need for my socks.
- In this post, I tested out a few different bind-offs for the cuffs.
- Finally, this post covers the benefits and drawbacks of both toe-up and cuff-down socks.
All of these posts might be helpful background reading if you’re also learning to knit toe-up socks.
As part of my learning process, I thought I’d try a new-to-me toe technique that Louise Tilbrook recently shared on her Instagram account. It involves using a different kind of increases on the toes for your toe-up socks. This technique makes it easier to keep track of where you are.
Why My Earlier Toe Up Sock Toes Didn’t Work Well For Me
First, let’s examine the issue with the previous sock toe I tried.
The last time I knit a pair of toe up socks, I used a very traditional toe increase. In that technique, you knit one, kfb, knit to two stitches before the end of the first half of the toe, kfb, knit one, and then repeat for the second half of the stitches in the toe. That’s a very effective and tight increase. It makes for a sturdy, neat toe.
There’s just one problem. When you knit toe up, it’s hard to keep track of the yarn on the end of the round. That’s because it’s inside the toe instead of dangling down from the cuff. This also means it’s a little harder to remember whether you are on an increase round or a plain round. The kfb can be kind of hard to see, too, especially in darker yarn.
All of this meant that there were a couple points on my first pair of socks where I should have increased and didn’t. There were also some where I didn’t need to increase but did anyway. I didn’t really mind because they were my first pair of toe-up socks and I was mostly experimenting, but I knew I wanted something a little neater for my next pair of socks.
Louise’s Toe Innovation
When I saw Louise’s post, I knew this was the technique I had been looking for. Instead of using kfb, Louise uses a yarn over. Then, on the next round, she knits that yarn over through the back loop, which tightens it up and prevents it from leaving a hole in the toe. I’ve used this increase method on round-yoke sweaters before, but I had never tried it on a sock.
The advantage the yarn over has over the kfb method is that it’s very easy to see whether you have worked an increase. That way, you are not terribly likely to work an increase on a plain round or fail to increase on an increase around. While this increase method is not as snug and tight as a kfb, it is sturdy enough that I think it will do the trick.
If you are hard on your sock toes, though, you may prefer to stick with a denser increase. That’s because there is still a tiny bit of a gap at the bottom of the stitch created when you knit the yarn over through the back loop. If, like me, you mostly wear your knit socks around the house and while you’re sleeping, it won’t be an issue at all.
A Closer Look At My Toe Up Sock Toes
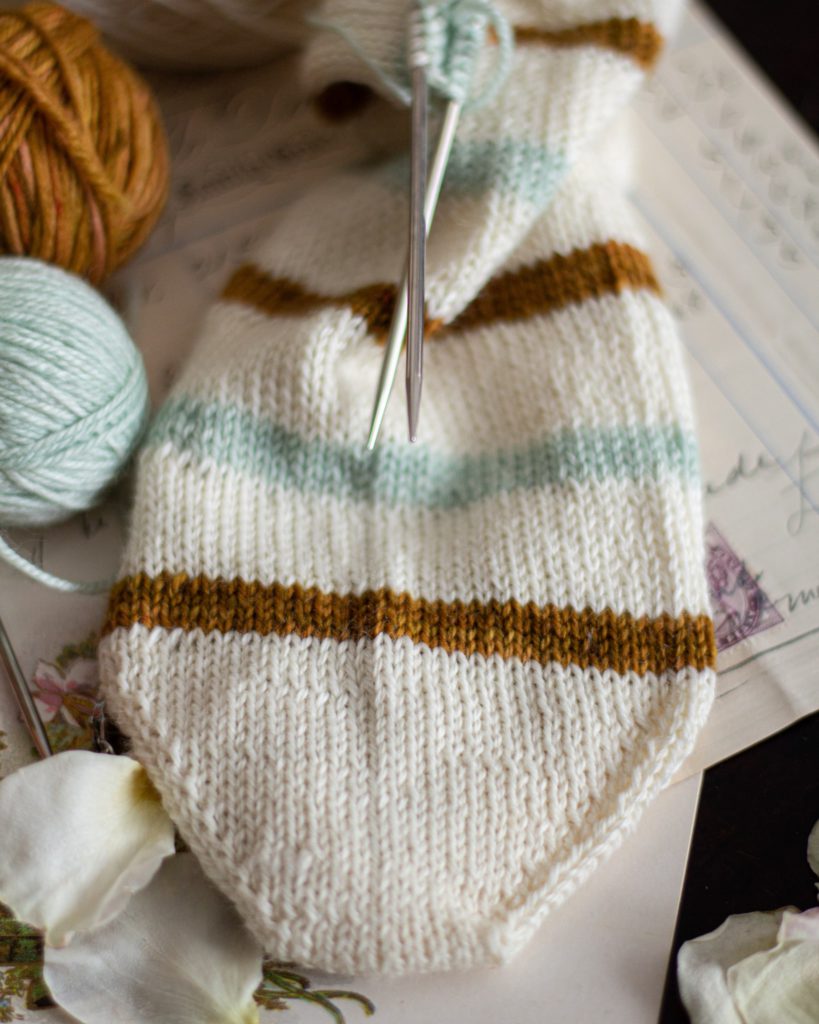
Here’s a peek at my first sock toe using this method.
I’m pretty pleased with this! It’s very tidy, and I like the pretty ridges along the increase edge. Unless I find something I like better, I think I will use this method going forward.
If I’m honest, I still generally prefer cuff-down socks. I’ve got a little problem, though: there are a few more combinations of leftover sock yarn that are calling my name. There’s some pink from the Amicus Socks and some cloudy gray from the Socktober Socks. I might not be able to resist for much longer.
How about you? If you’re a toe-up knitter, what sorts of increases do you prefer using? I’d love to hear about other techniques that I can experiment with in future pairs. Drop me a comment and let me know what you’d recommend.
Let’s stay connected!
Join my newsletter for 30% off all new releases, regular updates with helpful tips and tricks, first crack at registration for upcoming workshops, exclusive discounts, and more.
Join the A Bee In The Bonnet Facebook Group to participate in knitalongs and other fun community events
Come hang out with me on the A Bee In The Bonnet TikTok
Follow along on the A Bee In The Bonnet Instagram
Get inspired via the A Bee In The Bonnet Pinterest

I’ve been trying k1r, k2, k1l on my practice toes & am happy with the snugness, but I will try your method next to see which toe inc looks & feels better. Thanks for your suggestion!
I love that there are so many different ways to work the toe increases, and they all look a little bit different but all do the job well.
I always do toe up socks, strongly dislike grafting toes. After the first couple rounds, I just take a yarn needle and poke the tail through to the other side to keep track of the round start. At the end of the sock, I just poke it back through and weave it in. All the socks I’ve done have used Make One Left/Right increases. I’ve done them enough times now, I can look at the previous round and see if it had an increase. I can see the little twist loop with a new stitch coming out of it. I’d like to try Lifted Increases though. I used them on some pumpkins recently and they seemed tighter and appeared to blend in even more. I also thought they were easier to work than the Make Ones, split the yarn way less.
I love your trick for keeping track of the round start! I’ll have to give that one a try next time I make a toe-up sock.
I’ve been knitting socks for about a year now and my friends/family ask why I’m not tired of it yet – There are so many different heels/toes and patterns available that I could easily keep making socks for the rest of my life without a repeated pair – thanks for the great blog post – That’s a suggestion that I’m going to definitely try out!
Socks are my very favorite thing to make, even though most of the time I only wear them to bed. They’re portable and full of fun details. Glad you’re enjoying them, too!
I have an invitation for a new integrated heel design you might like to try in one of your socks.
It’s called “Elaine’s Happy Heel” and is available as a free download on Ravelry.
It doesn’t use short rows or wrap and turns (yeah!) and creates a tidy heel that looks good too.
You can use it for toe-up or top-down socks.Give it a try!
Thanks for the tip! I will make sure to check it out. It sounds interesting.
put a removable marker on the front beginning of row side of sock to keep track, I don’t remove the marker until I have finished the heel. I always use this method of k1yo, like you said.
This is such a great tip! I’ll give it a whirl next time.
I am pretty new at making socks. The patterns that I have been using have used m1l and m1r increases. I was also struggling with getting lost. Plus I feel that twisting a m1r is tedious. Just last week I read where an author found a simple YO was much easier. My response was an intelligent Duh. I had to try it. So far, I am thrilled. Thanks for helping us improve our skills.
I know some people love m1l and m1r, but they’re not my favorite increases! I love using LLI and RLI on mitts and sweaters, and the simple YO here works great.
I have recently fallen in love with toe up socks and I use short row toes. I use magic loop and find starting socks from the toe super finicky and tight and frankly, not enjoyable. But short row toes are great because you start with a provisional cast on of half your stitches and once you pick up your cast on stitches, it’s pretty smooth sailing to your bind off!
Oh, now that is interesting! I’ve never used a short-row toe but now I’m quite curious. I’ve made a note to try it out and write a future blog post about it. Thanks for the tip!