I don’t often have a chance to test knit a pattern for somebody else. When fellow knitwear designer Norah over at Fox and Folk posted last month about a new bonnet pattern, though, I was all in. You see, I have a little niece who lives somewhere cold, and the bonnet featured a new-to-me technique I’d been meaning to try: roosimine.
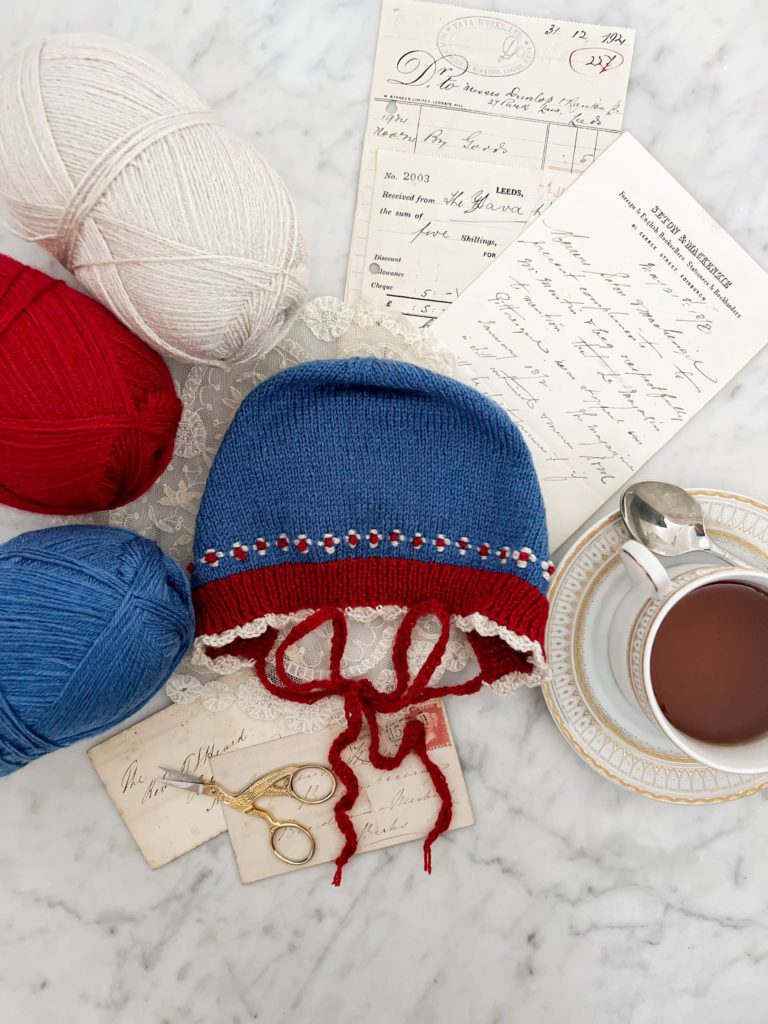
I love learning new techniques by working on patterns designed by others. It’s a great chance to learn from somebody else and to think about knitting patterns from a new perspective. So often, I think about them from my position as a designer. Knitting someone else’s pattern gives me the chance to think about them as a knitter, too.
What Is Roosimine, Anyway?
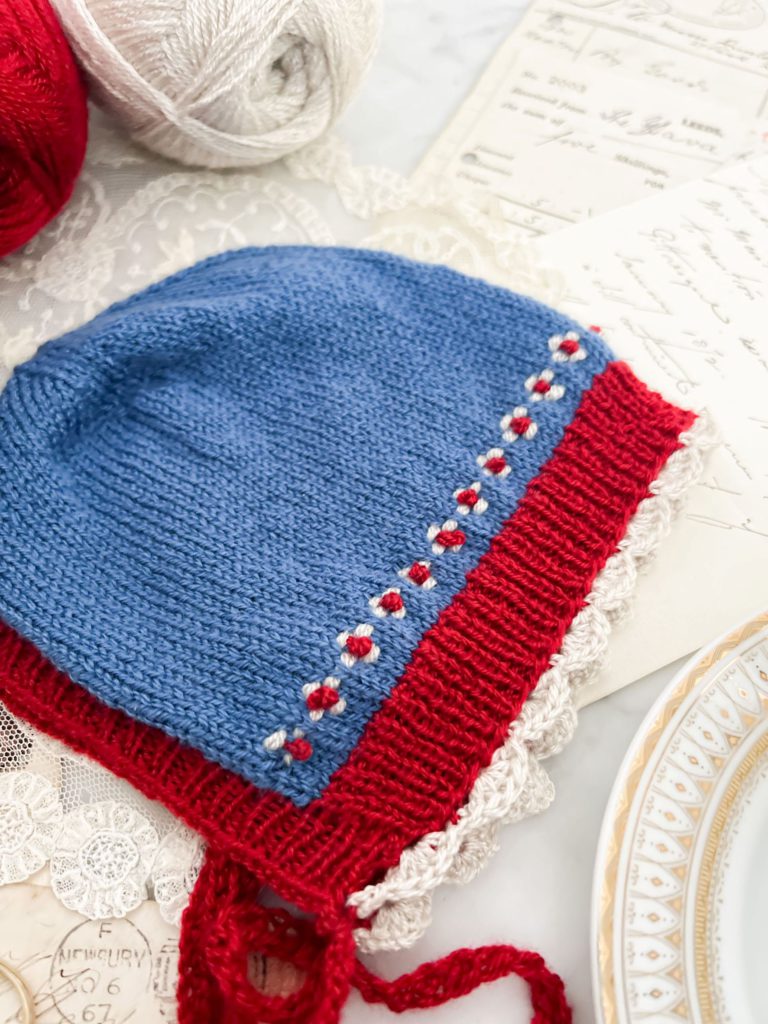
Roosimine is an Estonian inlay technique. It uses contrasting strands of yarn draped across your working stitches to form intentional designs that have the appearance of embroidery. These embellishments look a bit like the floats on the back of stranded colorwork knitting, but the design is more snug against the fabric and forms clearer, more obvious patterns. Most importantly, the floats of yarn in this technique are actually on the right side of your knitting so they’re visible when you wear your finished item.
You’ll see this technique used a lot on mitts and socks and other small circumference projects where tiny details can really shine. Although it’s a versatile technique, it’s less common on garments because the floats can get very long on larger knits. Like with stranded colorwork, you don’t want your roosimine strands to be too long or they’ll snag and pull. This is especially important to keep in mind because, unlike with stranded colorwork, roosimine has floats on the right side of the work and those floats are therefore more exposed to things that might snag them.
Roosimine is also popular because it is a great way to use yarn scraps to embellish simpler knits. A plain stockinette sock is all well and good, but if you can jazz it up using a minimal amount of yarn in a contrast color or two, that sounds pretty exciting to me.
Finally, Roosimine is probably the easiest of the traditional Estonian knitting techniques, which means it’s the perfect technique for an advanced beginner to try. Regardless of your skill level as a knitter, though, this technique is an excellent choice for knitters who want to add embellishment with the look of embroidery to their work.
A Note About Vocabulary
In my research for this post, I’ve sometimes seen English-language sources use the words “roosimine” and “roositud” interchangeably. I don’t speak Estonian, but I have seen other sources explain that “roosimine” refers to the technique itself, while “roositud” refers to the resulting design or embellishment. I’ve also seen sources that say “roosimine” is the verb and “roositud” is the noun.
If any Estonian knitters or somebody who speaks Estonian comes across this post and has some more insight into the distinction between the two, I’d love to hear from you so I can make sure I’m using the right terminology!
How My Roosimine Experiment Turned Out
I love learning new yarn techniques, but it’s been a while since I picked up a new one. I tried out a boomerang heel last spring on my Seaward Flow Socks, and I spent most of 2020 learning how to knit brioche more comfortably, but that’s about it.
It was time to try something new.
I watched a few tutorials on YouTube first so I could get a better understanding of the mechanics. Three important things stood out to me.
First, it helps to choose contrast yarn that is very similar in construction to your working yarn. A strong contrast color on the same base is great for this type of work. For example, if you’re using fingering-weight yarn for your background, don’t use DK-weight yarn for your roosimine.
Second, I noticed that maintaining even tension is key. Because roosimine isn’t secured every few stitches by knitting a stitch or two in the contrast color, it can be easy to tug the contrast yarn too tight or too loose as you work. If you’re struggling with loose tension, try wrapping the end of the yarn around your pinky on your working hand as well as on your non-working hand so you don’t pull it all the way through your work.
Third, it’s common to do roosimine with the contrast yarn held double. This helps it stand out a little more against the background color. Ultimately this is a matter of personal preference, but I went with the double strand for my first project.
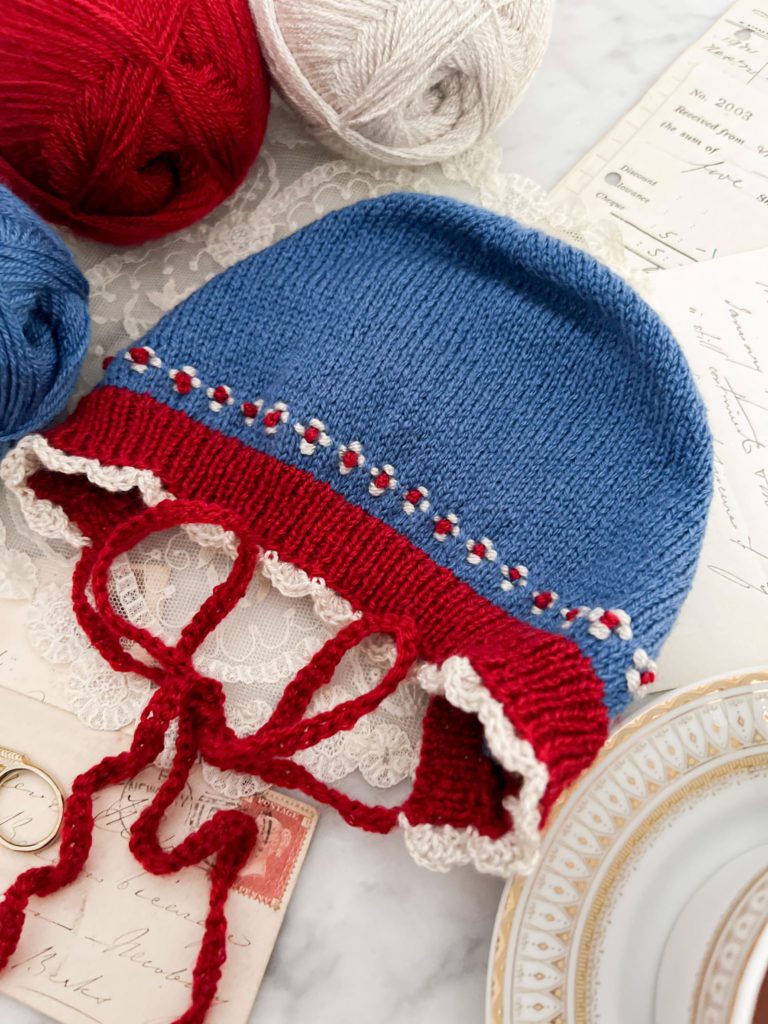
As you can see from the photos of this sweet little bonnet, things turned out okay! I love how the strands of yarn really stand out against the darker main color. You can definitely see spots where the tension is somewhat uneven, especially on the middle row and at the ends of each row. I’d like to practice more on some additional projects, so I’ll probably be working up some socks and mitts with pretty little details in them to refine my technique.
All things considered, though, I’m really pleased with how this turned out.
About My Version of the Sweet Everlasting Bonnet
As I mentioned earlier, I made this bonnet as part of a test knit for Norah of Fox and Folk. It’ll be available in November 2022. If you’d like to make your own, be sure to sign up for her newsletter so you don’t miss the announcement when it’s available.
I knit my version with Loops & Threads Woolike because my sister requested machine washable fibers. I made the 6-month size, and the whole bonnet took just 17 grams of yarn. Not bad for a finished object!
To make the ties, I worked a crochet chain, secured it to the corner of the bonnet, and then worked single crochets all the way back down to the tip. I did that for both sides, tied them to the same length, and snipped off any excess yarn.
If you make a version of this bonnet, too, let me know! It was such a fun knit that I think I’m going to make a few more in different colors.
Let’s stay connected!
Join my newsletter for 30% off all new releases, regular updates with helpful tips and tricks, first crack at registration for upcoming workshops, exclusive discounts, and more.
Join the A Bee In The Bonnet Facebook Group to participate in knitalongs and other fun community events
Come hang out with me on the A Bee In The Bonnet TikTok
Follow along on the A Bee In The Bonnet Instagram
Get inspired via the A Bee In The Bonnet Pinterest

